
Shopifyで人気の無料テーマDawnでは、通常のセクションを設定するだけではリッチなストアに仕上げることは難しいです。
しかし、少しのカスタマイズでリッチにすることができます。
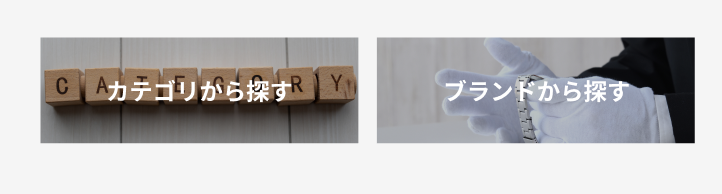
今回はバナーセクションを実装して、ストアをリッチにする方法を解説します。
とても簡単で実装できるので、コーディングが苦手な方でも実装できる内容ですので、ぜひ参考にしてみてください。
目次
手順
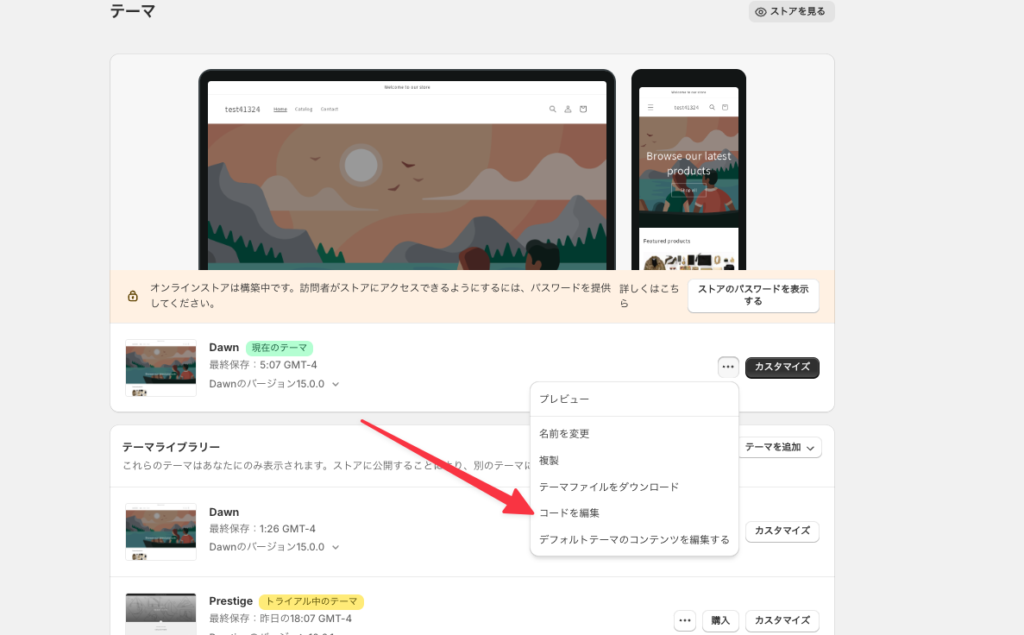
まずは管理画面の3点リーダーから「コードを編集」からコード編集に入ってください。
次にセクション用のLiquidファイルを追加していきます。
「新しいセクションを追加する」から任意の名前でLiquidファイルを追加してください。
ここでは「custom-banner.liquid」とします。
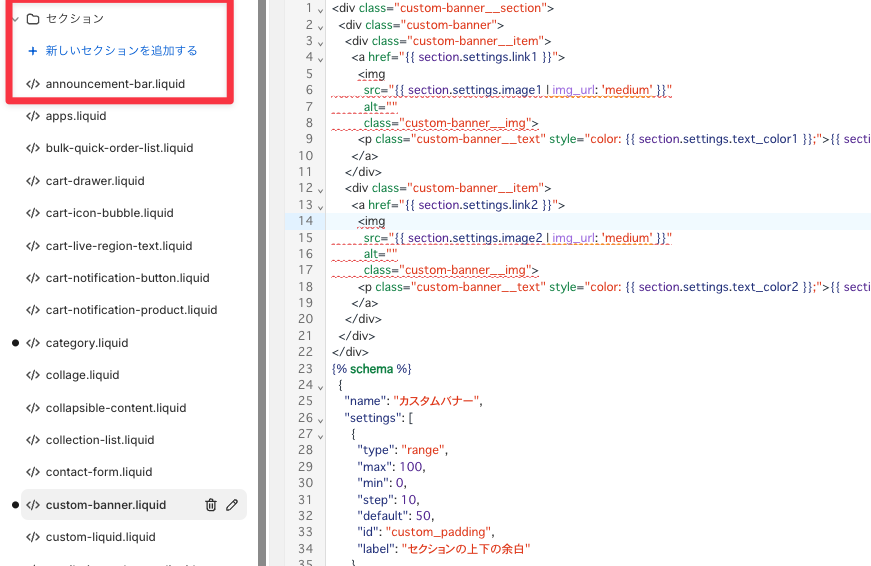
追加したLiquidファイルに下記のコードをコピペしてください。
<style>
  .custom-banner__section {
    padding: {{ section.settings.custom_padding }}px 0;
    background-color: {{ section.settings.custom_color }};
  }
  .custom-banner {
    display: flex;
    justify-content: space-between;
    max-width: var(--page-width);
    margin-inline: auto;
    padding: 0 5rem;
  }
  .custom-banner__item {
    position: relative;
    width: 48%;
    height: {{ section.settings.custom_range }}px;
  }
  .custom-banner__item a {
    display: block;
    width: 100%;
    height: 100%;
    text-decoration: none;
    position: relative;
    transition: opacity 0.7s;
  }
  .custom-banner__item a:hover {
    opacity: 0.8;
  }
  .custom-banner__item a::before {
    content: "";
    position: absolute;
    top: 0;
    left: 0;
    width: 100%;
    height: 100%;
    background-color: rgba(0, 0, 0, 0.5);
    z-index: 1;
  }
  .custom-banner__img {
    width: 100%;
    height: 100%;
    object-fit: cover;
  }
  .custom-banner__text {
    position: absolute;
    width: 100%;
    text-align: center;
    margin-top: 0;
    top: 50%;
    left: 50%;
    transform: translate(-50%, -50%);
    color: #ffffff;
    font-size: {{ section.settings.custom_size }}px;
    z-index: 2;
  }
  @media screen and (max-width: 749px) {
    .custom-banner {
      flex-direction: column;
      row-gap: 40px;
      padding: 0 1.5rem;
    }
    .custom-banner__item {
      width: 100%;
      height: calc({{ section.settings.custom_range }}px * 0.8);
    }
    .custom-banner__text {
      font-size: calc({{ section.settings.custom_size }}px * 0.8);
    }
  }
</style>
<div class="custom-banner__section">
  <div class="custom-banner">
    <div class="custom-banner__item">
      <a href="{{ section.settings.link1 }}">
        <img
          src="{{ section.settings.image1 | img_url: 'master' }}"
          alt=""
          class="custom-banner__img">
        <p class="custom-banner__text" style="color: {{ section.settings.text_color1 }};">{{ section.settings.text1 }}</p>
      </a>
    </div>
    <div class="custom-banner__item">
      <a href="{{ section.settings.link2 }}">
        <img
          src="{{ section.settings.image2 | img_url: 'master' }}"
          alt=""
          class="custom-banner__img">
        <p class="custom-banner__text" style="color: {{ section.settings.text_color2 }};">{{ section.settings.text2 }}</p>
      </a>
    </div>
  </div>
</div>

{% schema %}
  {
    "name": "カスタムバナー",
    "settings": [
      {
        "type": "range",
        "max": 100,
        "min": 0,
        "step": 10,
        "default": 50,
        "id": "custom_padding",
        "label": "セクションの上下の余白"
      },
      {
        "type": "range",
        "max": 40,
        "min": 10,
        "step": 1,
        "default": 16,
        "id": "custom_size",
        "label": "PCテキストサイズ※spは*0.8"
      },
      {
        "type": "color",
        "id": "custom_color",
        "label": "背景色",
        "default": "#fff"
      },
      {
        "type": "range",
        "max": 600,
        "min": 150,
        "step": 50,
        "default": 300,
        "id": "custom_range",
        "label": "画像の高さ"
      }, {
        "type": "image_picker",
        "id": "image1",
        "label": "画像1を選択してください"
      }, {
        "type": "url",
        "id": "link1",
        "label": "画像1のリンク先URL"
      }, {
        "type": "text",
        "id": "text1",
        "label": "画像1のテキスト"
      }, {
        "type": "color",
        "id": "text_color1",
        "label": "画像1のテキスト色",
        "default": "#ffffff"
      }, {
        "type": "image_picker",
        "id": "image2",
        "label": "画像2を選択してください"
      }, {
        "type": "url",
        "id": "link2",
        "label": "画像2のリンク先URL"
      }, {
        "type": "text",
        "id": "text2",
        "label": "画像2のテキスト"
      }, {
        "type": "color",
        "id": "text_color2",
        "label": "画像2のテキスト色",
        "default": "#ffffff"
      }
    ],
    "presets": [
      {
        "name": "カスタムバナー",
        "category": "カスタム"
      }
    ]
  }
{% endschema %}
保存を押して完了です!
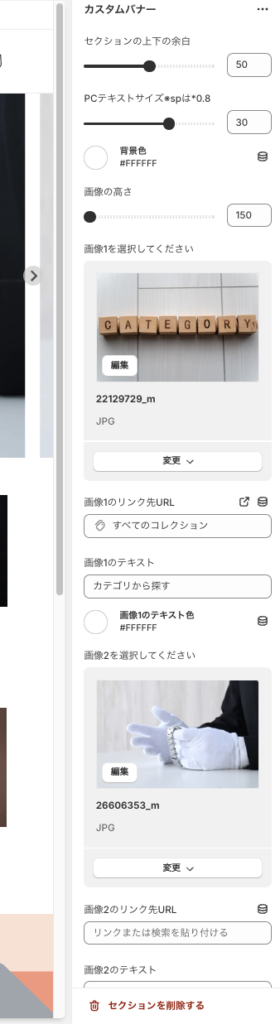
オンラインストアのカスタマイズからエディタで確認すると、追加できることがわかります。
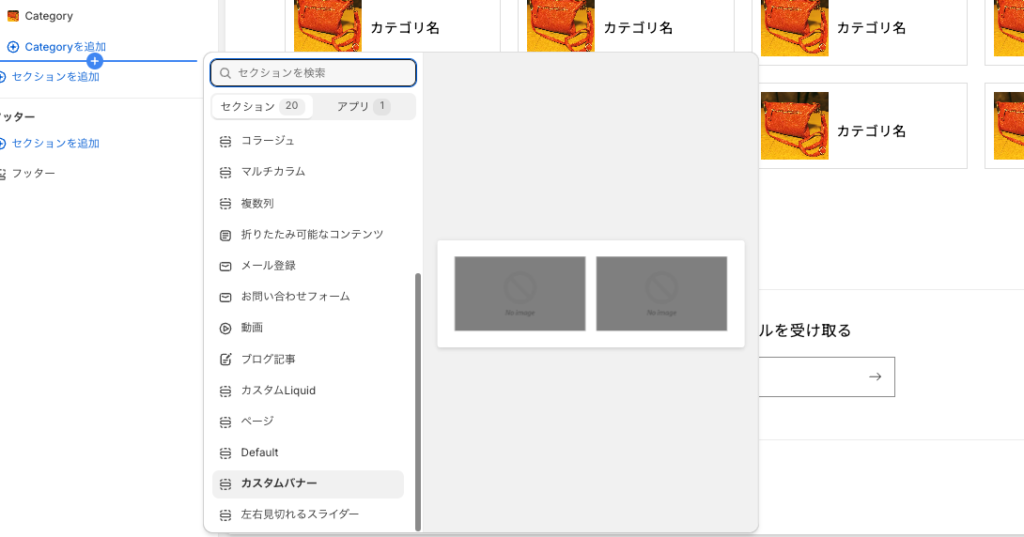
後はリンクや画像を設定してください。
画像の高さやフォントサイズも選べるようにしています!
まとめ
今回は、オリジナルバナーセクションを実装してリッチなストアにする方法を解説しました!
すごく簡単ですが、こういったセクション単位でのカスタマイズをしていくことで、無料テーマでもリッチなストアを作ることができますので、ぜひ参考にしてみてください。
また、このブログでは他にもShopifyのカスタマイズについて解説していますので、あわせて参考にしてみてください。
あわせて読みたい

【Shopify】左右が見切れているスライダーの実装方法
Shopifyのテーマのデフォルトスライダー、使いやすいけどもっとリッチにしたい! どのサイトも似たような印象になってしまう… このような方のための記事です。 今回は、...
あわせて読みたい
【Shopify】お問い合わせフォームにラジオボタンの追加
Shopifyでお問い合わせの項目にラジオボタンの項目を追加したい… 簡単にカスタマイズする方法はある? こんな方のための記事です。 Shopifyで人気の無料テーマDawnでは...