はじめに

Shopifyで会員限定ページを実装したいけれど、月額料金の高いアプリは使いたくない…。
そんな悩みを抱えている方は多いのではないでしょうか。
本記事では、アプリを使わずにJavaScriptとLiquidを使って会員限定ページを実装する方法を、具体的なコード例とともに解説します。
この方法を使えば、初心者の方にも簡単に実装でき、追加の月額コストなしで会員限定コンテンツを提供できます。
それでは、実装手順を見ていきましょう。
アプリを使用した会員制サイトの作り方は以下の記事で解説しています。
実装の手順
顧客タグの準備
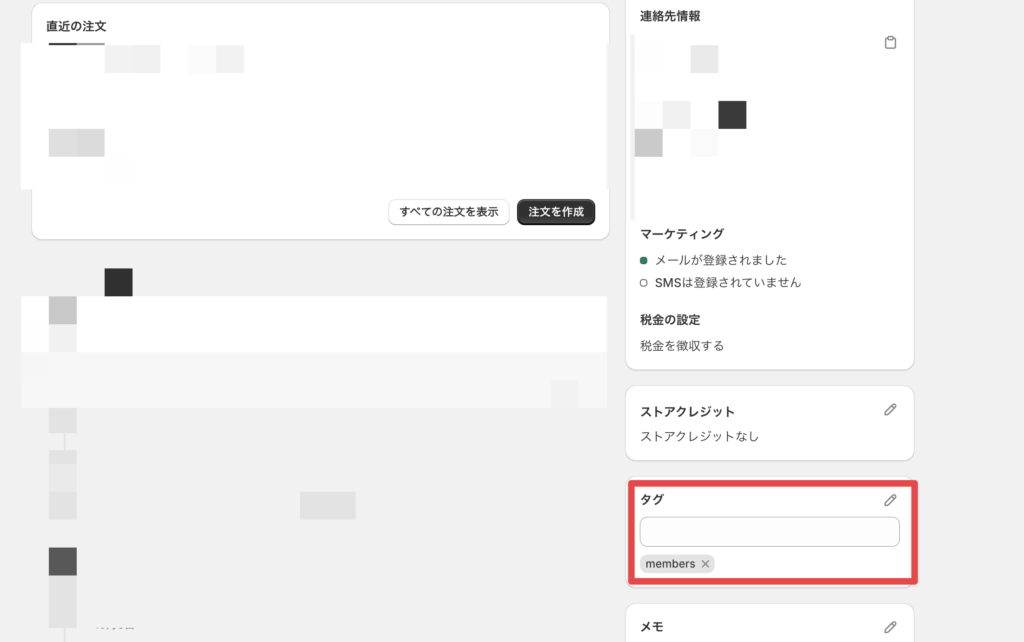
管理画面の「顧客管理」を選択し、顧客管理画面に移動してください。

任意の顧客を選択し、「タグ」の項目に「members」タグを追加してください。
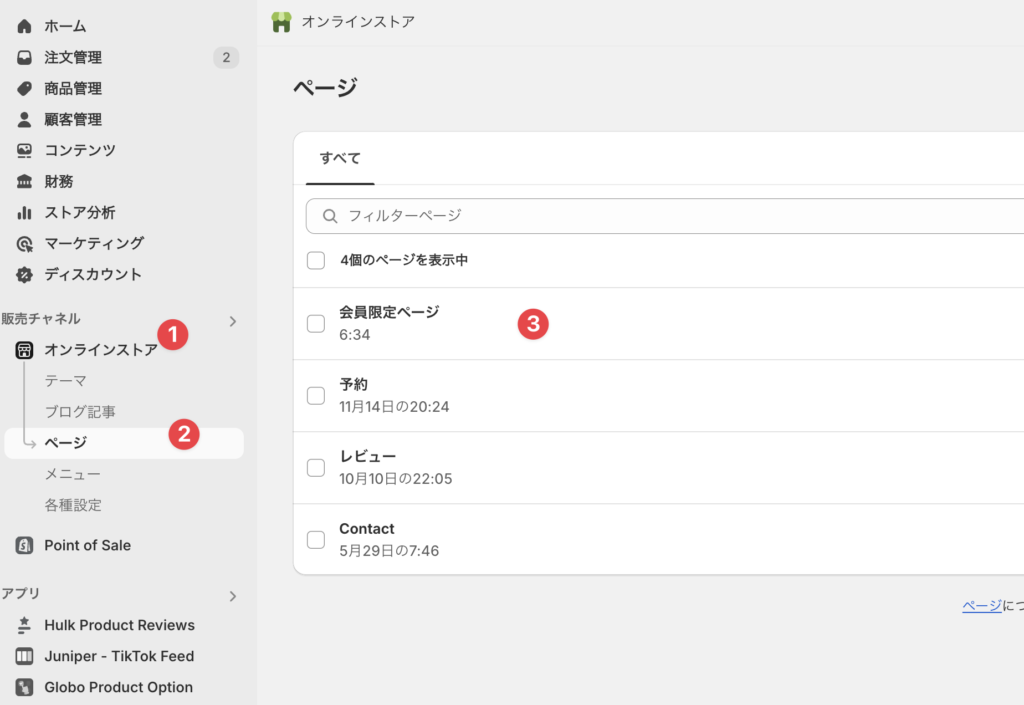
会員限定ページの作成
次に会員限定ページを作成していきます。
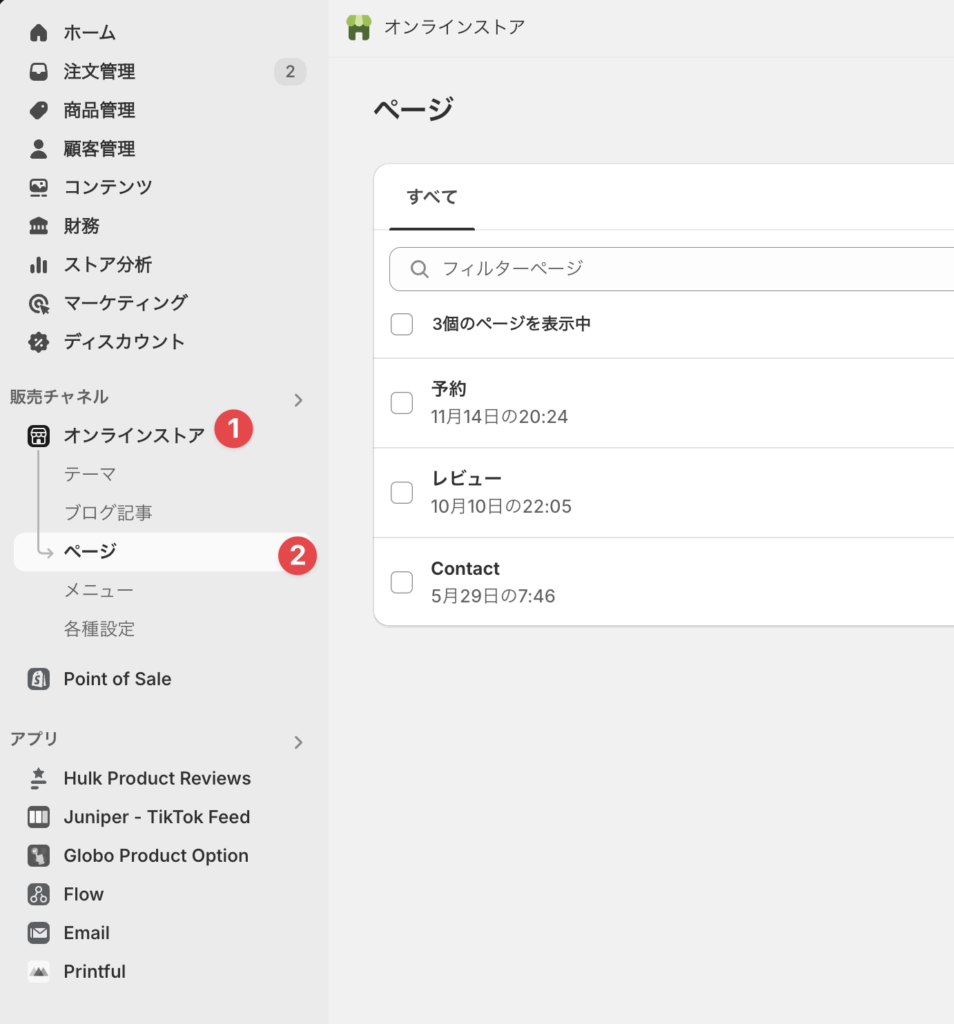
管理画面の「オンラインストア」→「ページ」の順番に選択してください。
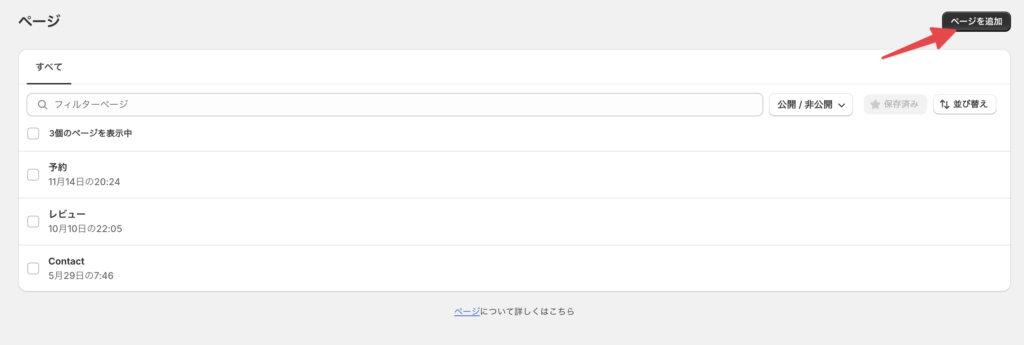
右上の「ページを追加」をクリックしてください。
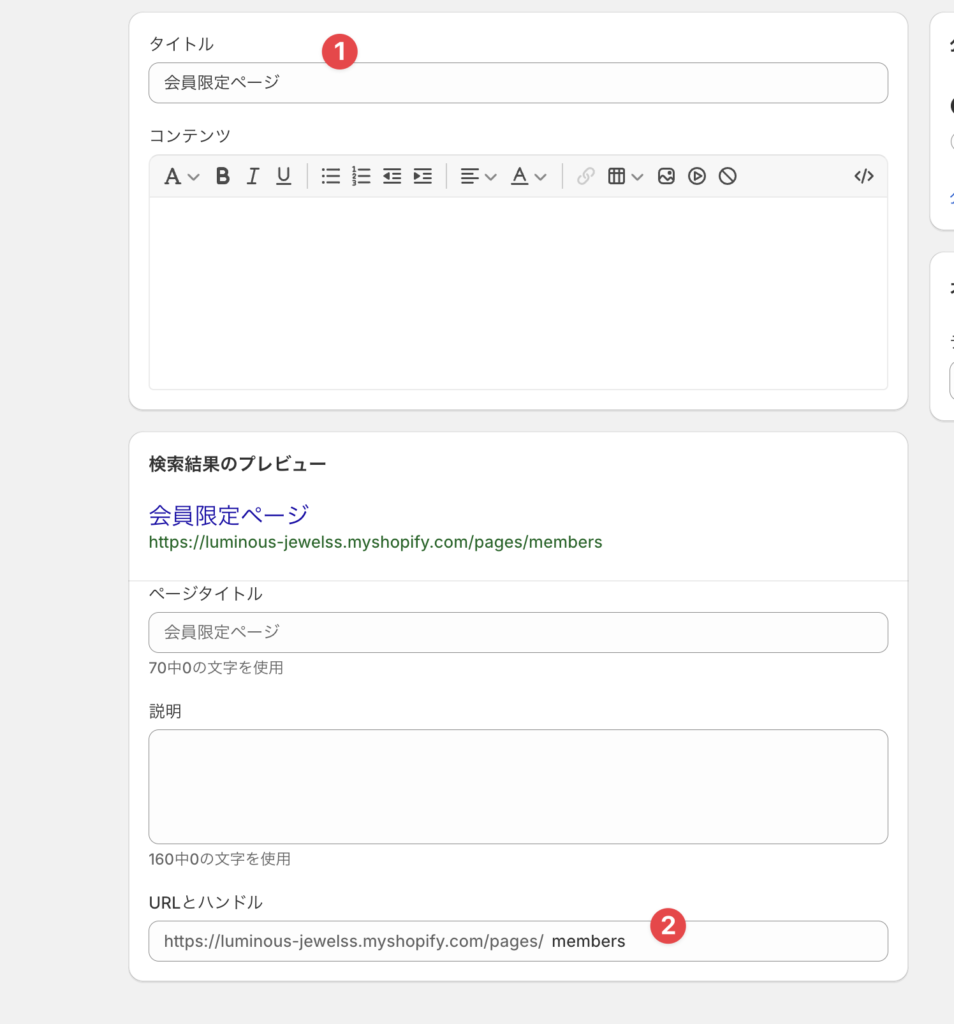
任意のタイトルを入力し、「URLとハンドル」の項目を「members」にしてください。
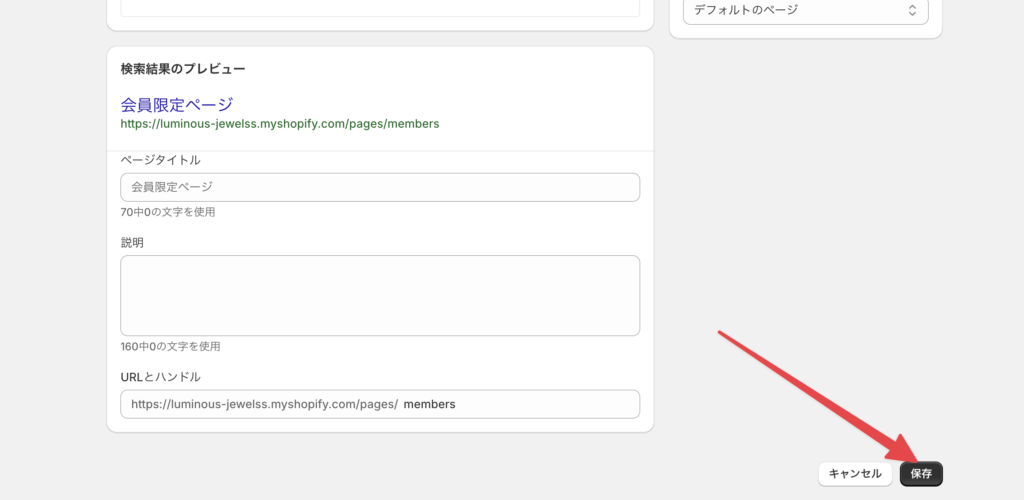
ここまでできたら右下の「保存」をクリックしてください。
会員限定コンテンツの編集
次に会員限定コンテンツを編集していきます。
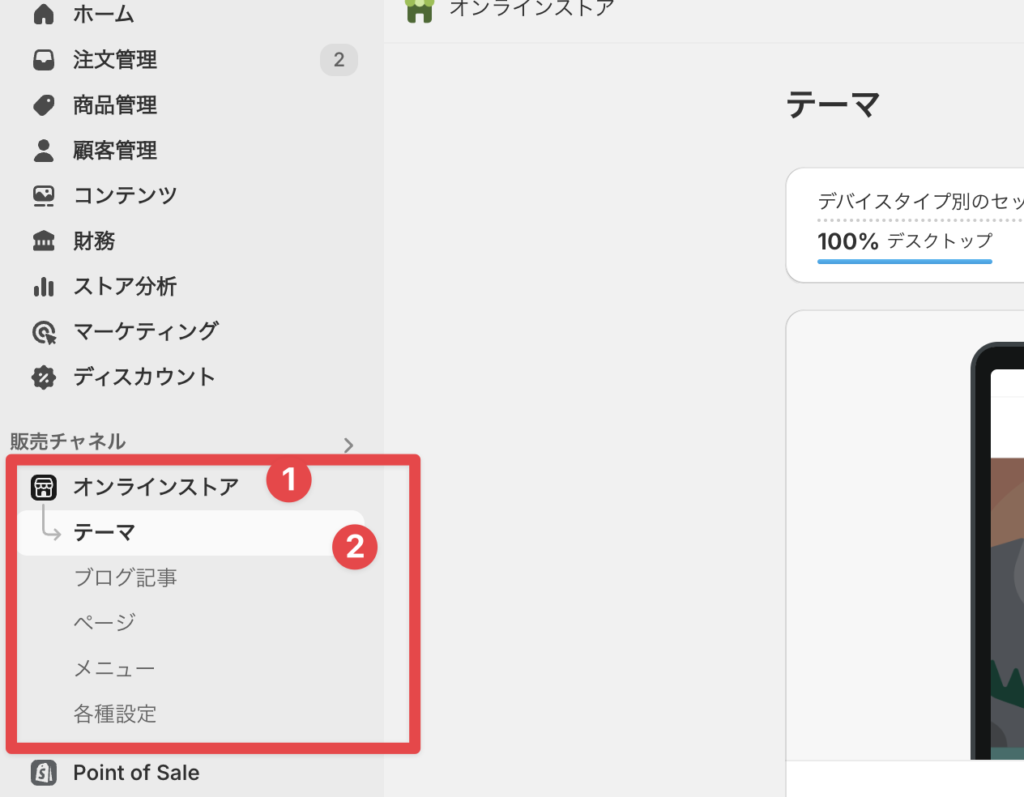
管理画面の「オンラインストア」から「テーマ」を選択してください。
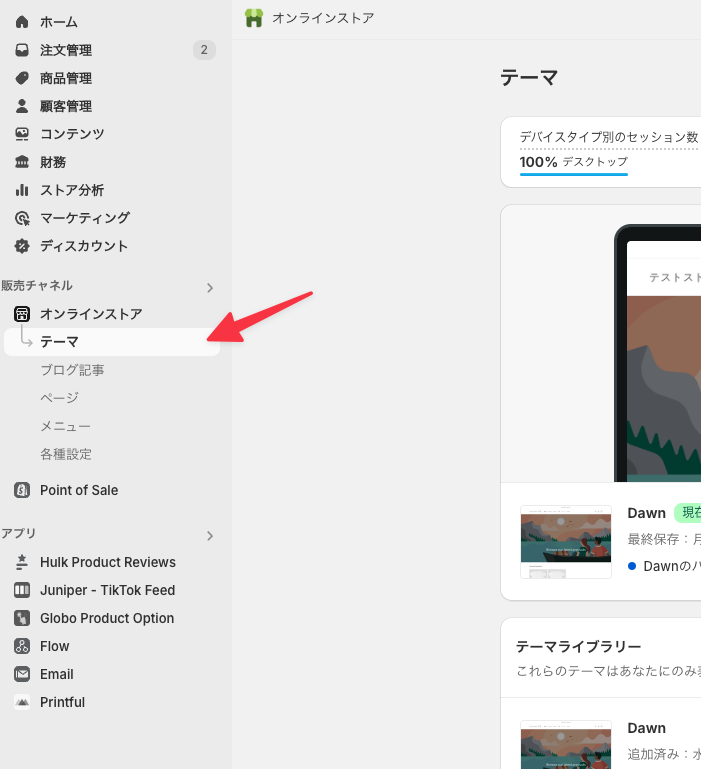
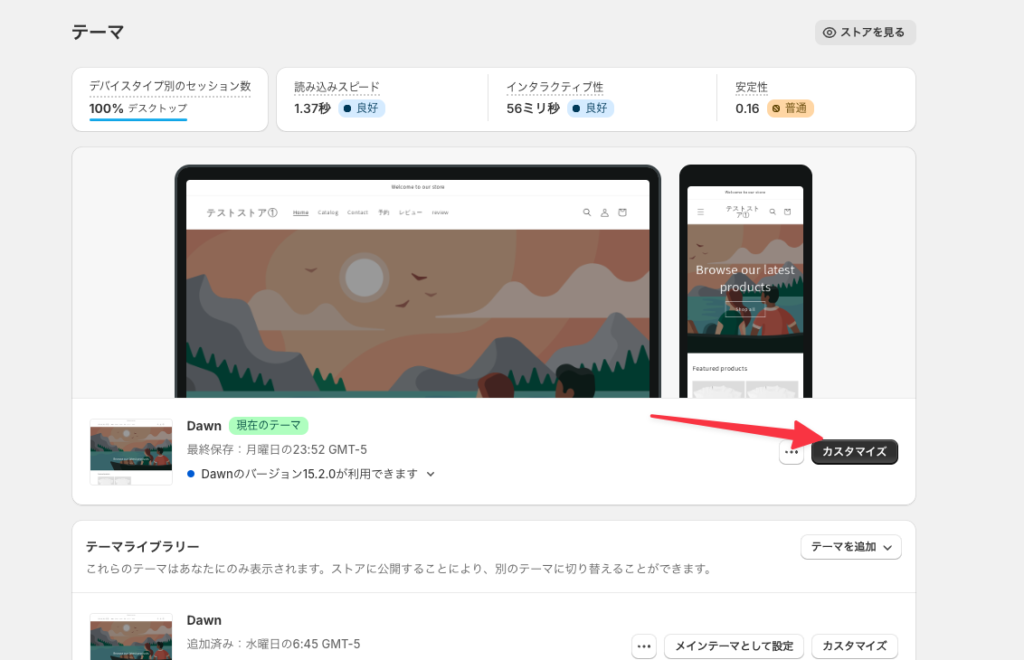
「カスタマイズ」を選択し、カスタマイズ画面に移動してください。
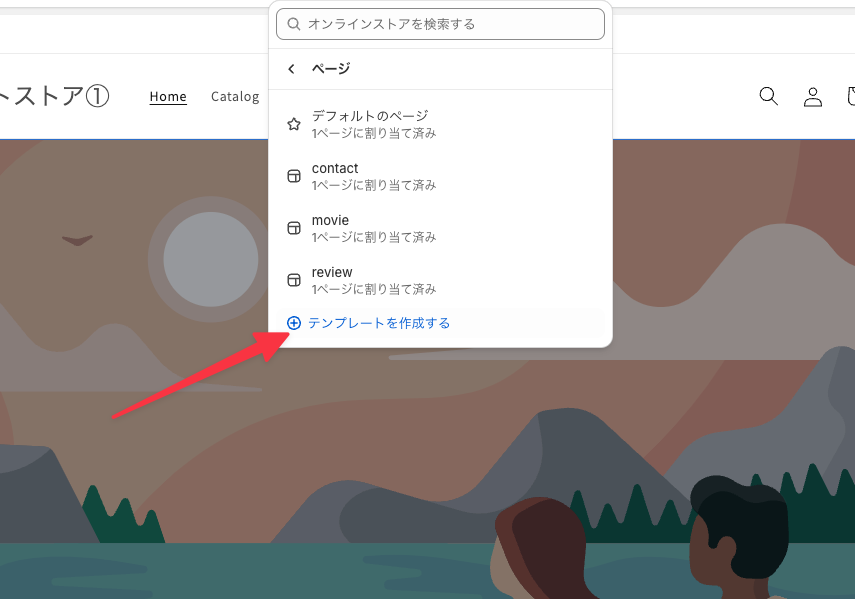
上部のプルダウンから「ページ」→「テンプレートを作成する」を選択してください。
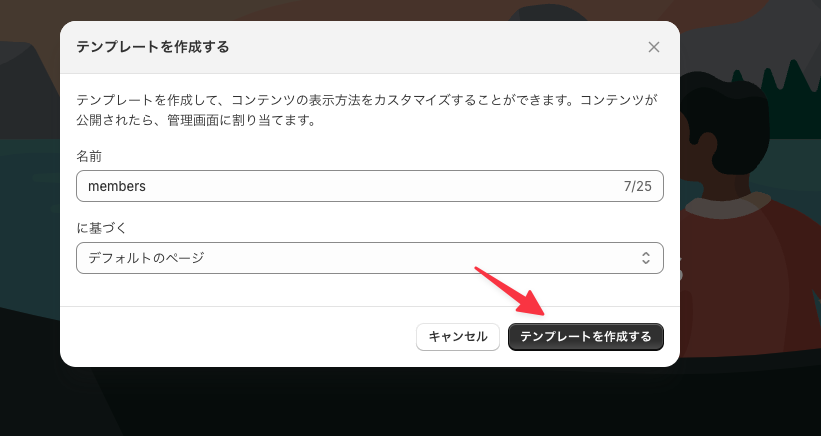
名前を「members」にして右下の「テンプレートを作成する」をクリックしてください。
このテンプレートが会員限定ページの内容になるので、任意にカスタマイズしてください。
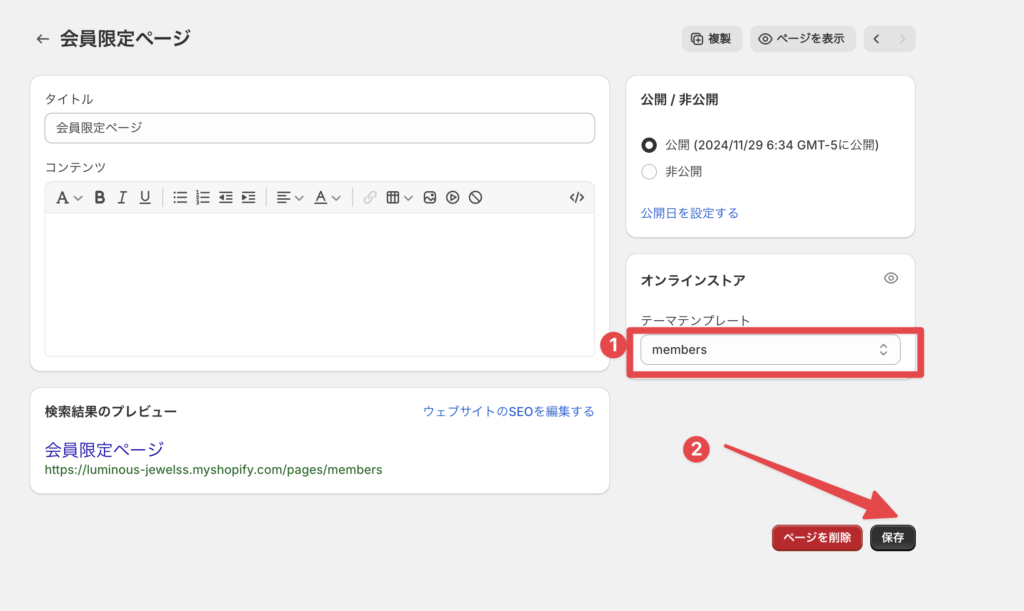
カスタマイズができたら、管理画面の「オンラインストア」→「ページ」から先程作成したページの設定に移動してください。
「テーマテンプレート」を先ほど作成した「members」にして保存をしてください。
コードの追加
次にtheme.liquidにコードを追加します。
管理画面の「オンラインストア」→「テーマ」を選択してください。
テーマの3点リーダーから「コードを編集」を選択して、コード編集画面に入ってください。
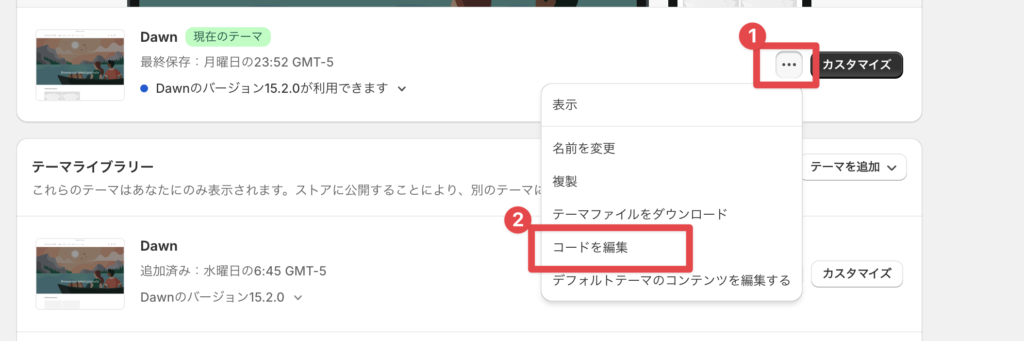
「レイアウト」から「theme.liquid」を選択してください。

</head>の直前に以下のコードをコピペしてください。
{% if template contains 'members' %}
{% unless customer %}
<script>window.location.href = '/account/login';</script>
{% endunless %}
{% endif %}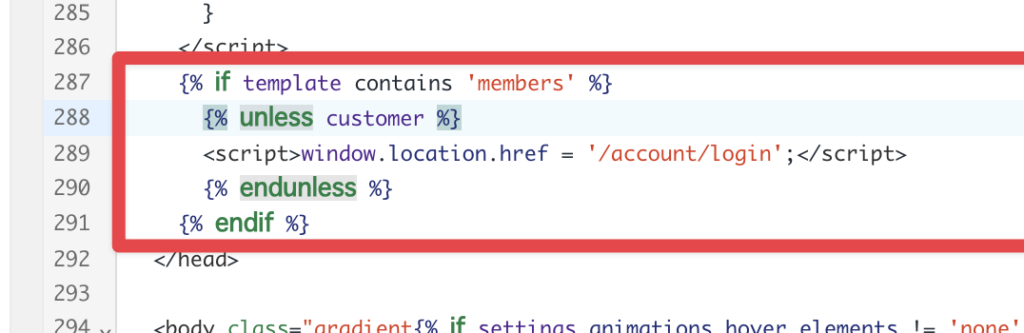
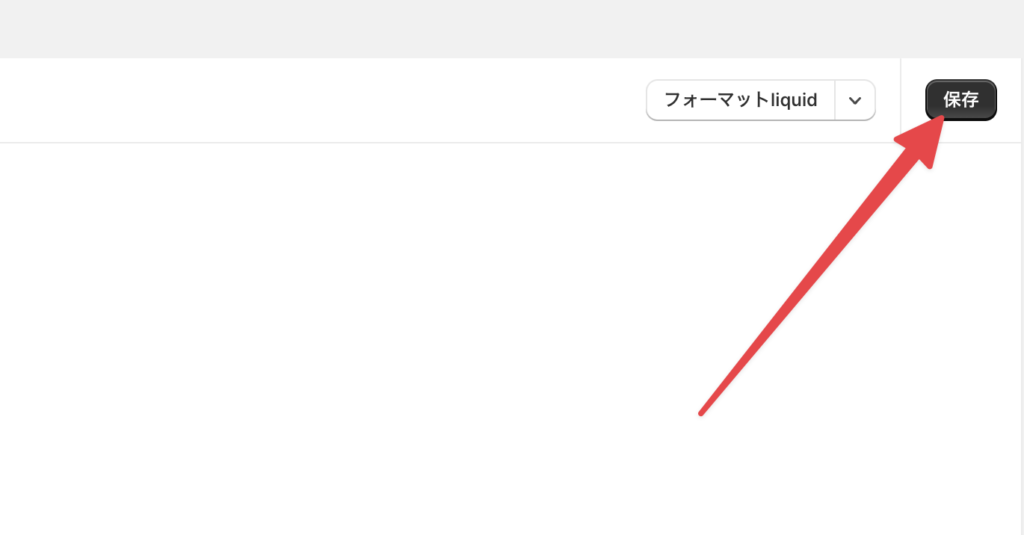
コードが追加できたら、右上の「保存」を押して保存をしてください。
これで「members」というタグを持っている顧客のみが「会員限定ページ」にアクセスできるようになりました。「members」タグを持たない顧客が「会員限定ページ」にアクセスした場合、ログインページに移動します。
さいごに
ここまで、Shopifyで会員限定ページを実装する方法についてご紹介してきました。
この方法なら、月額料金もかからず、基本的なカスタマイズも自由自在ですので、クライアントに提案しやすい選択肢の一つになるはずです。
ぜひ参考に実装してみてください。
関連記事