はじめに
Shopifyストアでの購入単価を上げるために、「送料無料まであと○○円」というバーの実装を検討されている方も多いのではないでしょうか。
送料無料バーを導入することで、以下のような効果が期待できます。
- 顧客の購入意欲を刺激し、購入単価の向上
- 「あと少し」という心理が働き、商品の追加購入を促進
- 送料無料の条件を明確に表示することで、顧客の安心感
- カート内の商品金額をリアルタイムで表示することで、ショッピング体験の向上
この記事では、プログラミング知識がなくても実装できる送料無料バーの作り方を2つの方法でご紹介します。
- アプリを使用する方法
- テーマファイルを編集する方法
どちらの方法も画面付きで丁寧に解説しますので、PCの基本操作ができる方なら30分程度で実装可能ですので、ぜひ参考にしてみてください。
アプリを使用した実装方法
まずは、アプリを使用した簡単な実装方法からご紹介します。この方法は、プログラミングの知識が全く必要ないため、初めてShopifyでストアを運営される方にもおすすめです。
おすすめのアプリ「送料無料バー」
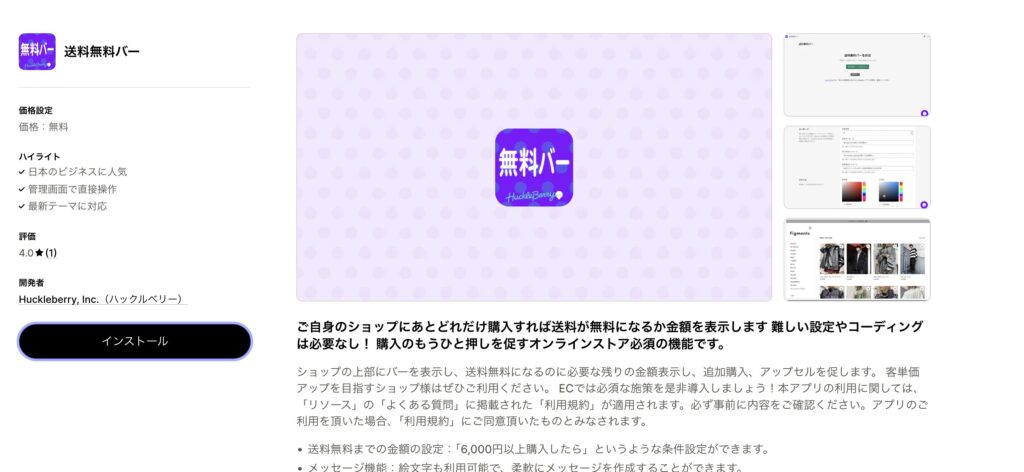
こちらは株式会社ハックルベリーが提供する無料アプリです。
日本のShopifyパートナー企業として多くの実績があり、信頼性の高いアプリとなっています。
インストールと設定手順
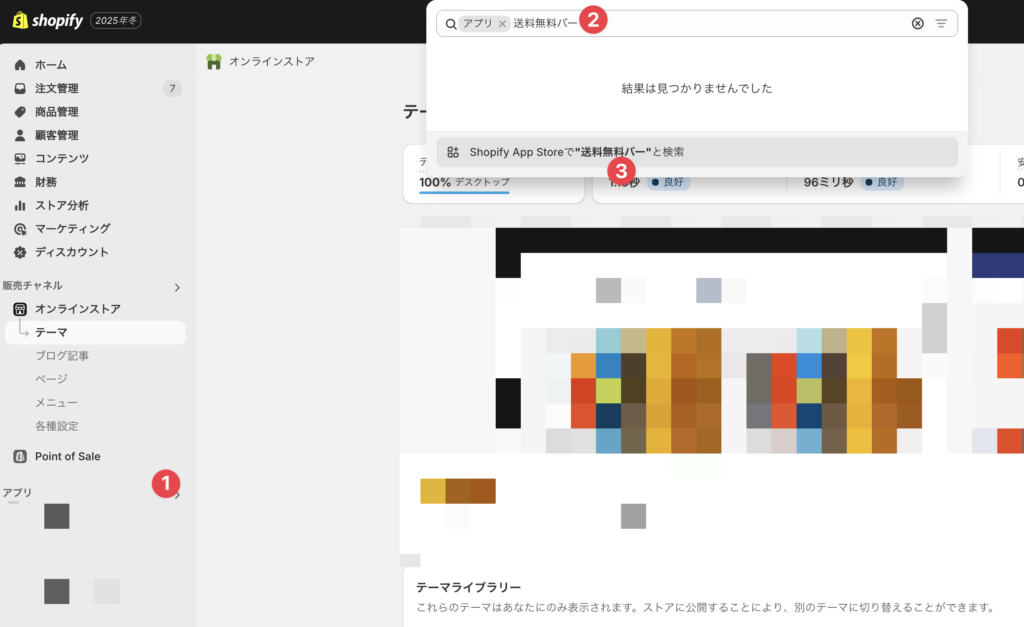
Shopify管理画面にログインし、左メニューの「アプリ」から検索バーに「送料無料バー」と入力し、「検索」をクリックします。
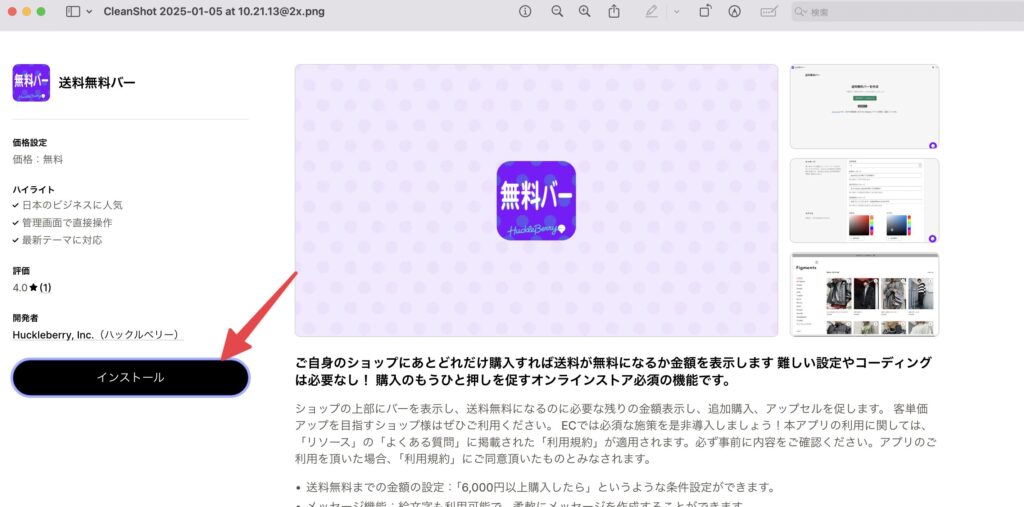
アプリ画面に変移したらインストールをクリックしてください。
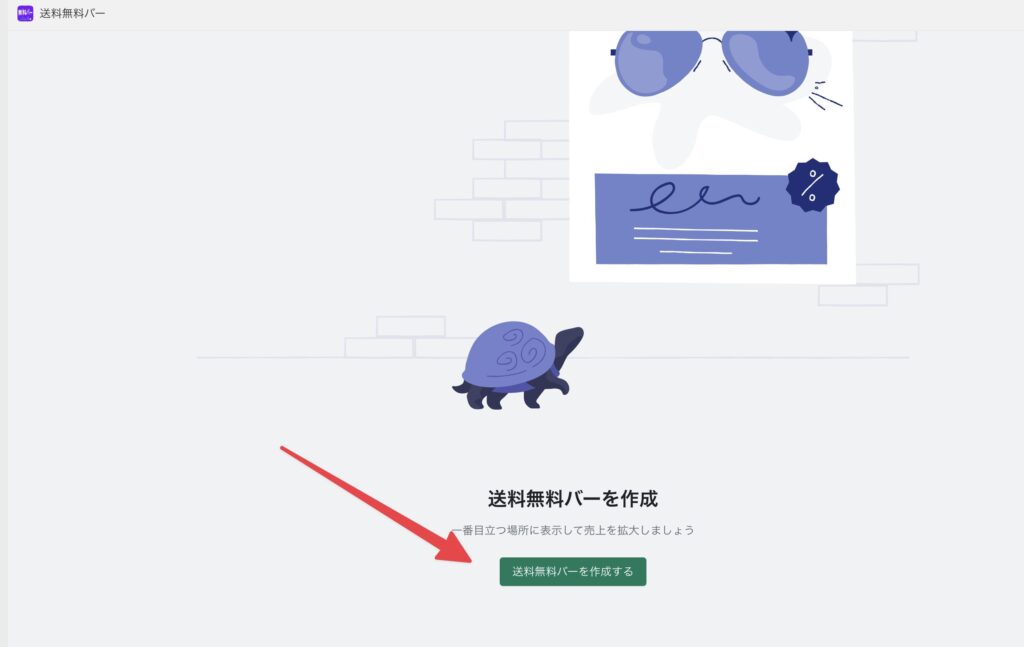
インストール後は、画面下部の「送料無料バーを作成する」をクリックしてください。
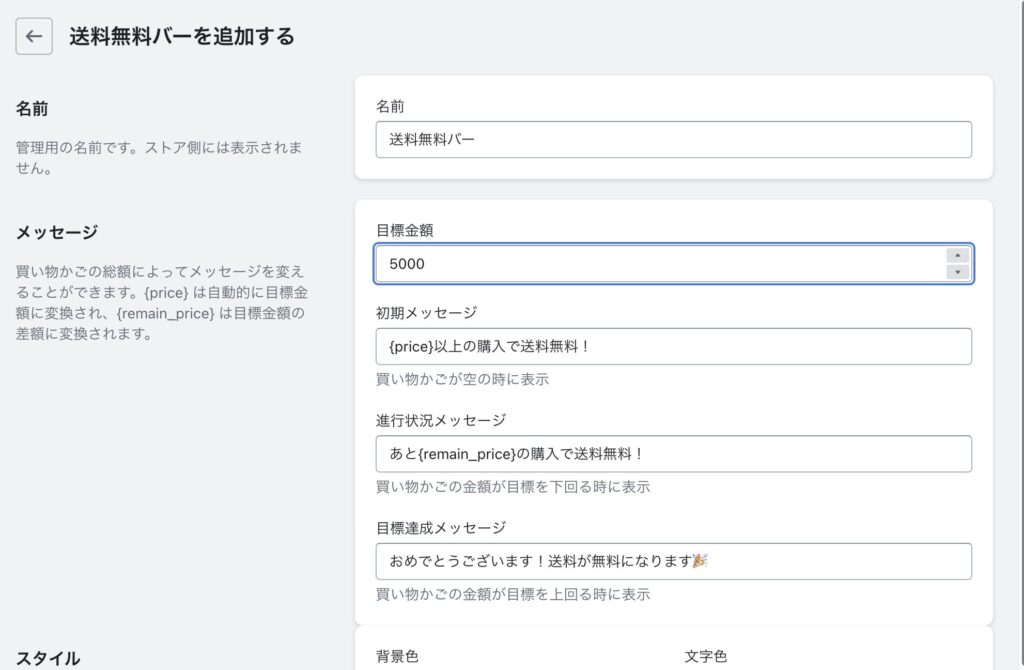
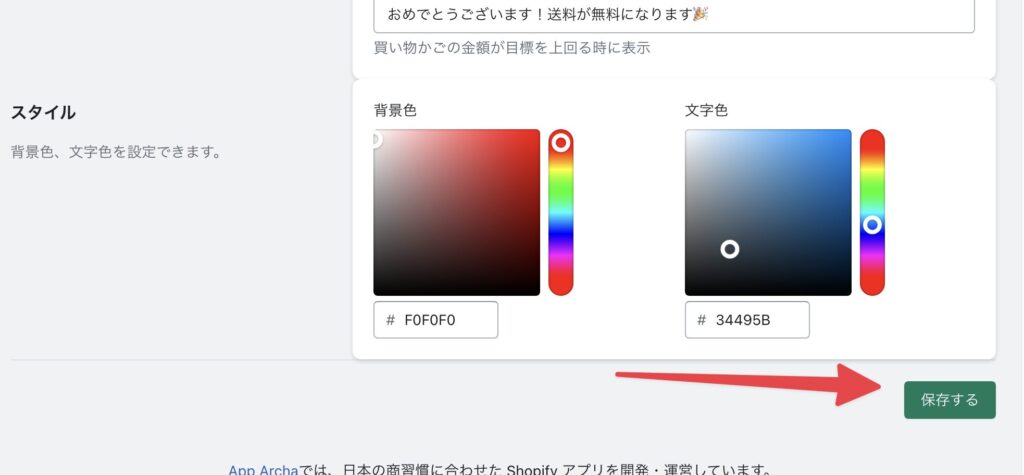
その後、料金などの各種項目を設定してください。
設定ができたら、右下の「保存する」を押してください。
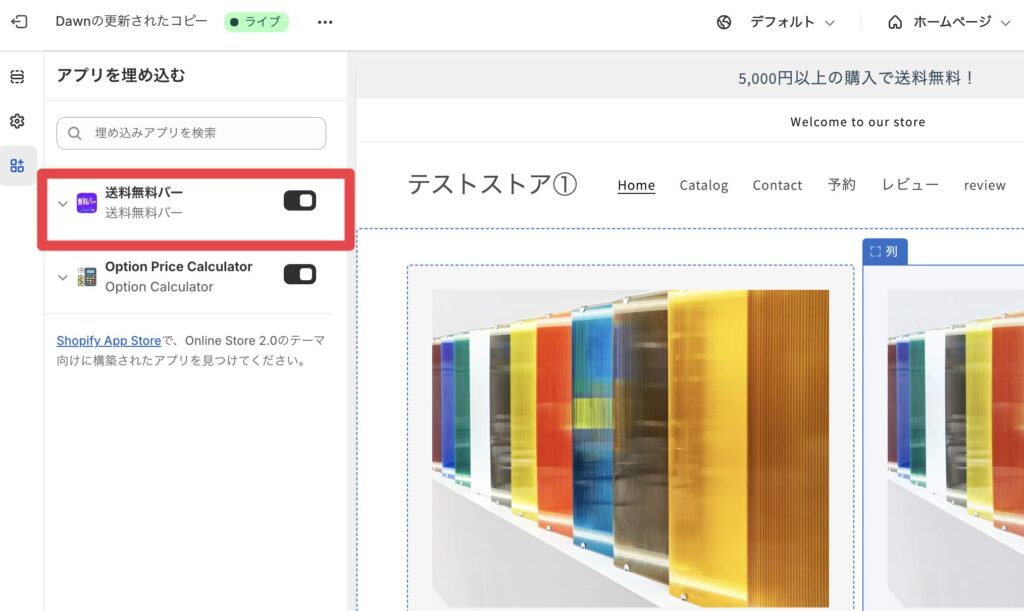
その後「有効化」を選択し、有効化をしてください。

最後にテーマのカスタマイズ画面で、アプリを有効にすると完了です。
現在時点(2025/01/05)では、カート更新されたときに自動更新ができないようですので、注意が必要です。
コードをを編集する方法
続いて、コードを編集して送料無料バーを実装する方法をご紹介します。アプリを使用する方法と比べて、より自由度の高いカスタマイズが可能で、カート更新時に自動更新することができます。
テーマファイルの編集手順
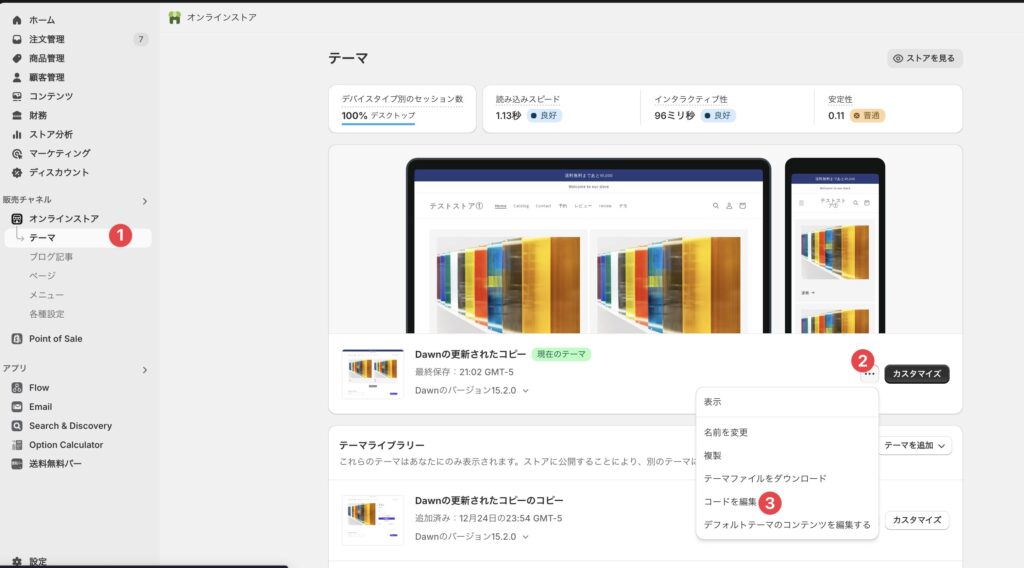
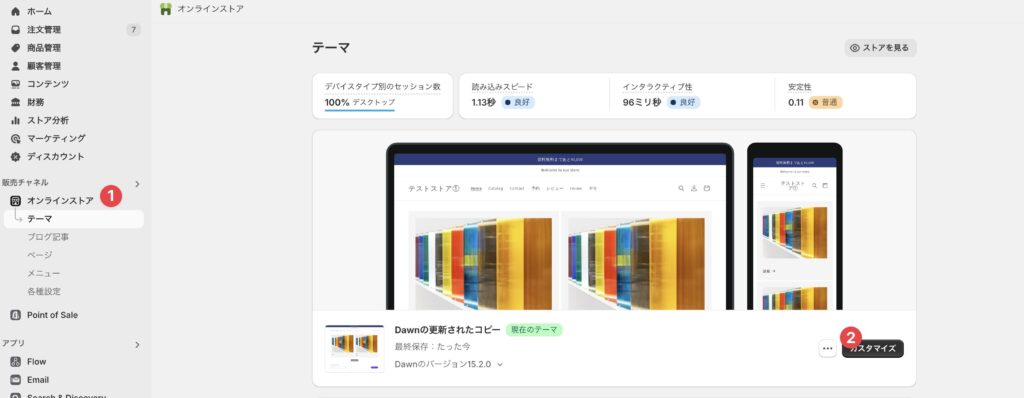
Shopify管理画面から「オンラインストア」→「テーマ」を開き、現在使用中のテーマの「3点リーダー」→「コードを編集」をクリックします。
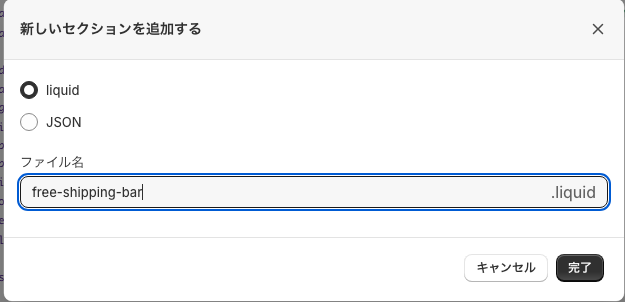
左側のファイル一覧から「sections」フォルダを開き、新規セクションファイルを作成します。
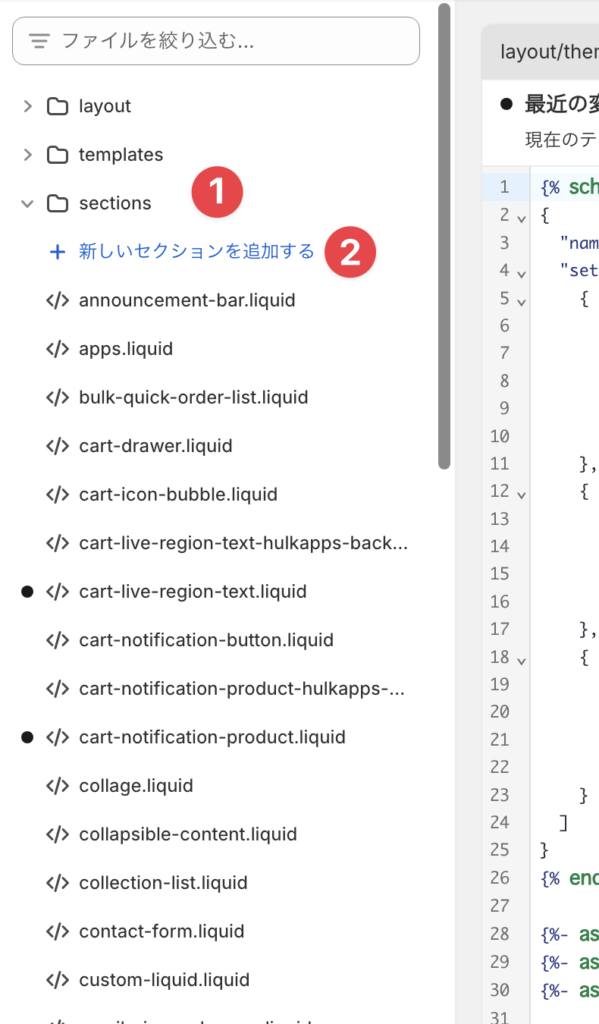
ファイル名は「free-shipping-bar.liquid」とします。
作成したファイルに、以下のコードをコピー&ペーストします。
{% schema %}
{
  "name": "送料無料バー",
  "settings": [
    {
      "type": "number",
      "id": "free_shipping_threshold",
      "label": "送料無料になる金額",
      "default": 5000,
      "info": "送料無料になる金額を設定してください(単位: 円)"
    },
    {
      "type": "color",
      "id": "text_color",
      "label": "テキストカラー",
      "default": "#000"
    },
    {
      "type": "color",
      "id": "background_color",
      "label": "背景色",
      "default": "#f1f2f6"
    }
  ]
}
{% endschema %}

{%- assign threshold = section.settings.free_shipping_threshold | default: 5000 -%}
{%- assign current_total = cart.total_price | divided_by: 100 | round -%}
{%- assign remaining = threshold | minus: current_total -%}

<div class="shipping-bar" data-threshold="{{ threshold }}">
  <p class="shipping-text">
    {%- if remaining > 0 -%}
      送料無料まであと¥{{ remaining | times: 100 | money_without_currency | remove: '.00' }}
    {%- else -%}
      送料無料です!
    {%- endif -%}
  </p>
</div>

<style>
.shipping-bar {
  position: relative;
  background: {{ section.settings.background_color }};
  height: 40px;
  width: 100%;
  text-align: center;
}
.shipping-text {
  position: relative;
  line-height: 40px;
  margin: 0;
  color: {{ section.settings.text_color }};
  font-size: 14px;
  font-weight: 500;
  z-index: 1;
}
</style>

<script>
function updateShippingBar(cart) {
  const bar = document.querySelector('.shipping-bar');
  const threshold = parseInt(bar.dataset.threshold);
  const total = Math.floor(cart.total_price / 100);
  const remaining = Math.max(0, threshold - total);

  const formatter = new Intl.NumberFormat('ja-JP');

  bar.querySelector('.shipping-text').textContent =
    remaining > 0 ? `送料無料まであと¥${formatter.format(remaining)}` : '送料無料です!';
}

function refreshCart() {
  fetch('/cart.js')
    .then(res => res.json())
    .then(cart => updateShippingBar(cart));
}

document.addEventListener('cart:updated', refreshCart);

const cartForms = document.querySelectorAll('form[action="/cart/add"]');
cartForms.forEach(form => {
  form.addEventListener('submit', () => setTimeout(refreshCart, 500));
});

window.setInterval(refreshCart, 1000);
</script>
次に「layout」の「theme.liquid」を開いてください。
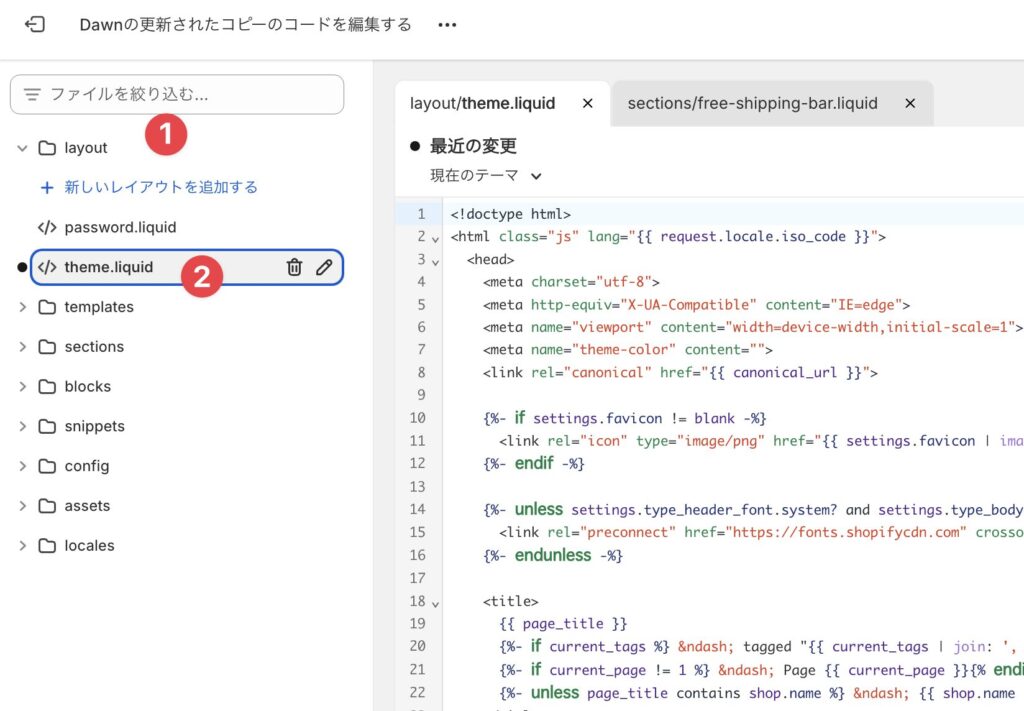
<body>タグの直下に以下のコードを貼り付けてください。
{% section 'free-shipping-bar' %}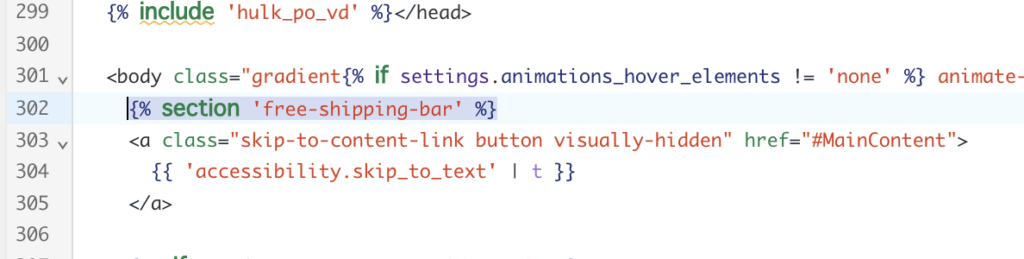
これで実装は完了です。
設定方法
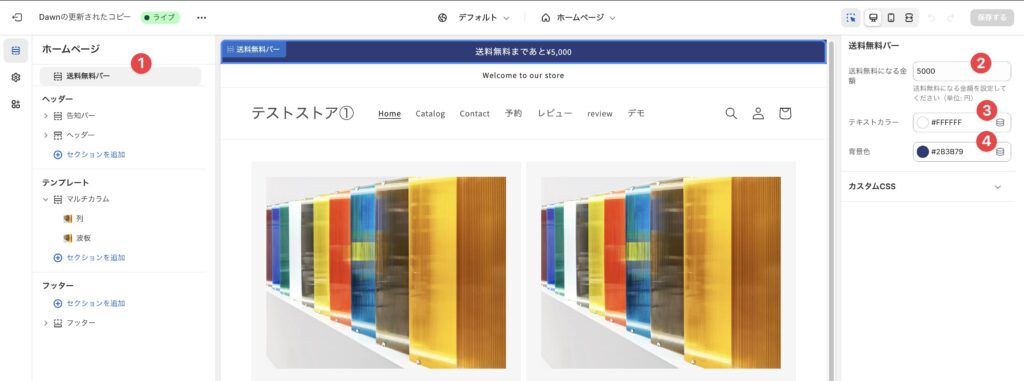
設定方法は簡単で、管理画面の「オンラインストア」から「カスタマイズ」を選択し、カスタマイズ画面に入ってください。
最上部の「送料無料バー」を選択すると、金額や背景色を設定できるので、お好みに合わせて設定してください。
さいごに
送料無料バーの実装方法について、アプリを使用する方法とテーマファイルを編集する方法の2つをご紹介しました。
どちらの方法も無料で簡単に設定できますので、ぜひご自身のストアに実装してみてください。送料無料バーの導入により、お客様の購買意欲を高め、購入単価の向上につながることが期待できます。